The trend lines can be excellent commercial tools if used correctly and in this publication, I will share three powerful tendency lines with you.
But first, keep in mind the two most important concepts when it comes to drawing and using trends:
- A confirmed trend line has 3 contact points
You can always connect two random points in your graphics, but only if you have a third party, you are dealing with a validated and active trend line. - Never cut the bodies
It is good to cross the candles wicks when drawing a line of trend, but never crossed the bodies!
#1 rest and try again
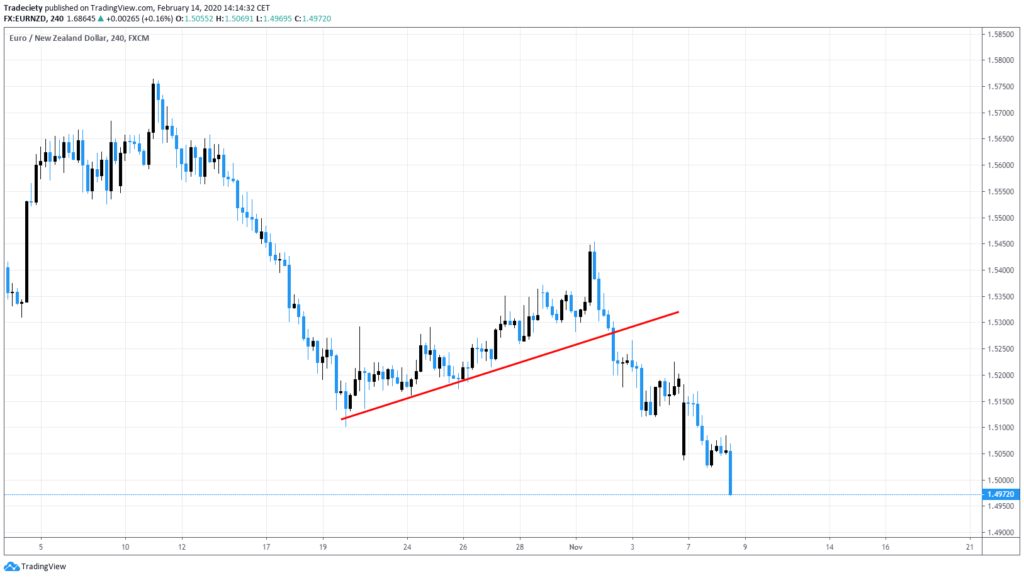
The rupture and new test strategy is a fairly common strategy used by many different merchants.
The idea is that once he identified an active trend line, he hopes the price will leave it. Sometimes the price will simply sink and the price won the viewpoint back. However, if the price negotiates again in the trend line, the new test can often be negotiated as a high probability configuration. The moment can be done within a lower or direct period in the same period where he identified the trend line.
The trend line acts as the input trigger and also helps to place stops. The stop loss is generally placed on the other side of the trend line and the trend line acts as a level of protection between the entrance price and stop loss.
The more contact points have a line of trend, the better it will be suitable for the rest and repetition strategy. In the following example, the trend line has at least 3/4 valid contact points. Duration The rupture, there was a lot of volatility in the market and the price was around the line of trend for quite some time.
The level of aggressiveness of the merchant determines how early the entrance will be. An aggressive and more risky merchant could enter an operation as soon as the price touches the line of trend. A more conservative merchant would wait for the price to move away from the trend line and exhibit signs of impulse in the commercial address.
There is no correct or incorrect and the entry synchronization depends on the preferences of the merchant.
#2 trend line flag
While Break & Reester scenarios can be considered reversal trade or early trend, the flags are classified as the regular or late trend.
With the flag trade, look for an established trend and then expect a consolidation/setback. If you can describe the setback with a trend line, then it may be possible to exchange such a flag, the price has broken the trend line and resumed trade in the tendency direction.
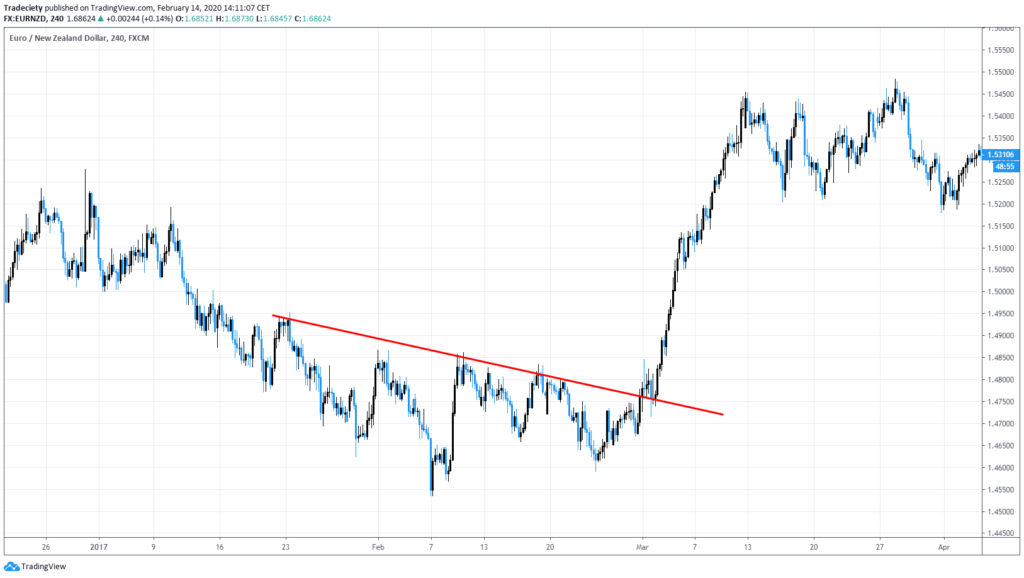
In screen capture below, the price was the first in an bearish trend before the trend stopped and set a flag defined by the trend line. Here, we can obtain additional information about market participants; While the initial descending trend was strong and the price fell quickly at the door of a short period of time, the bullish flag patterns only showed a weak purchase interest. Comparing the intensity of the trend can help to understand how likely a breakdown of the trend line can be. In this example, the bearish trend was significant stronger than the bullish flag pattern, which means a greater probability of a lower trend continuation.
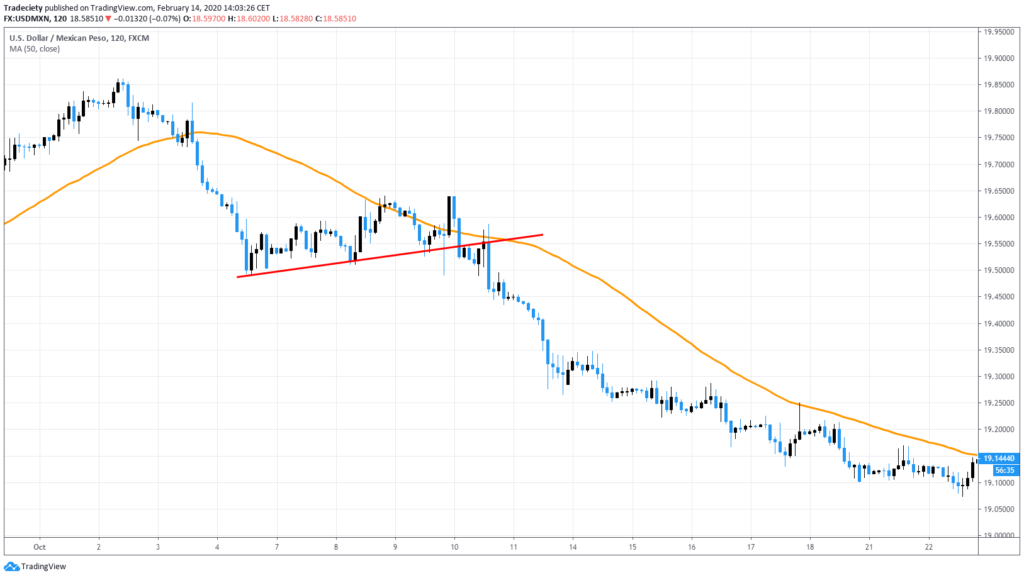
It is also possible to add a long -term mobile avenge to its graphics when it comes to flag trade. The 50 mA help idelify the long -term trend and said merchant would only look for flag patterns that indicate a continuation in the tendency direction.
In screen capture below, the mobile average indicates a bearish trend because the price was quoted below the mobile average. The flag pattern indicates a temporary roast and the rupture of the trend line confirmed the continuation of the trend.
#3 trend line bun
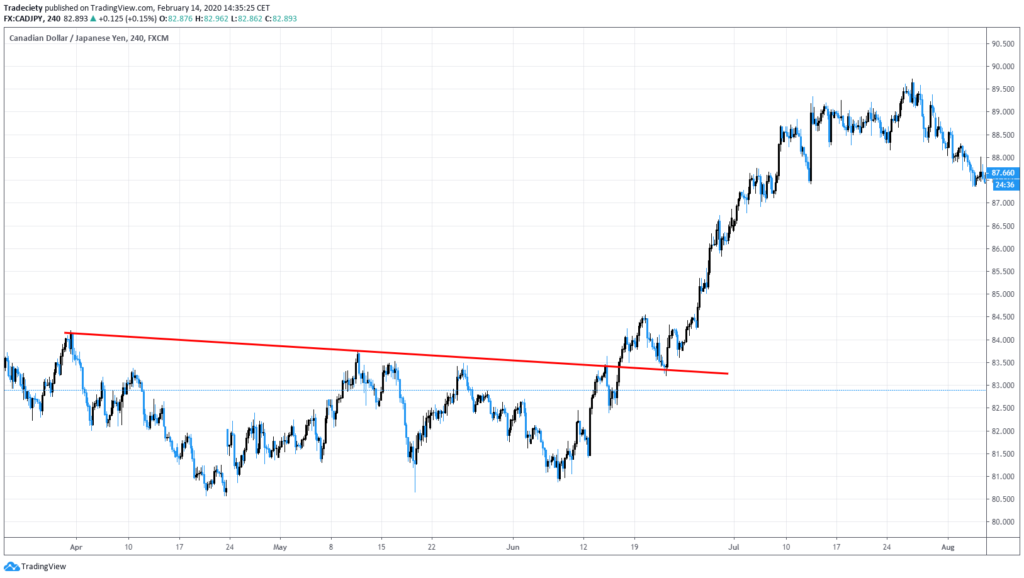
Trending line rebounds are also commercial trends monitoring approaches. Unlike the flag pattern, the trend line is not used for time trade inputs, but to identify scenarios in which the trend line acts as support or resistance.
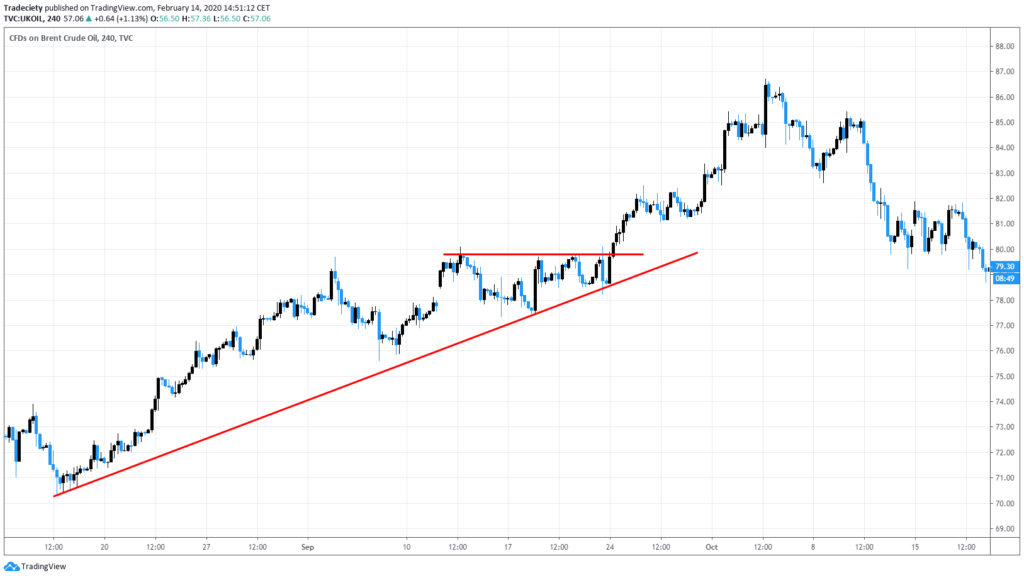
In screen capture below, the price bounced in the trend line during the third consecutive time, confirming the validity of the trend line. Then, merchants would look for other technical patterns around the bouncing trade inputs in time. In this case, the price has established a level of horizontal resistance around the trend rebound. The horizontal level then allows you to tame the operations after a break.
In this strategy, the merchant could be more conservative and place the stop loss below the trend line, or use a stop loss below the level of resistance.
Again, there is no correct or incorrect. Everything deepens the appetite of the merchant’s risk. I wrote about loss detention techniques before.
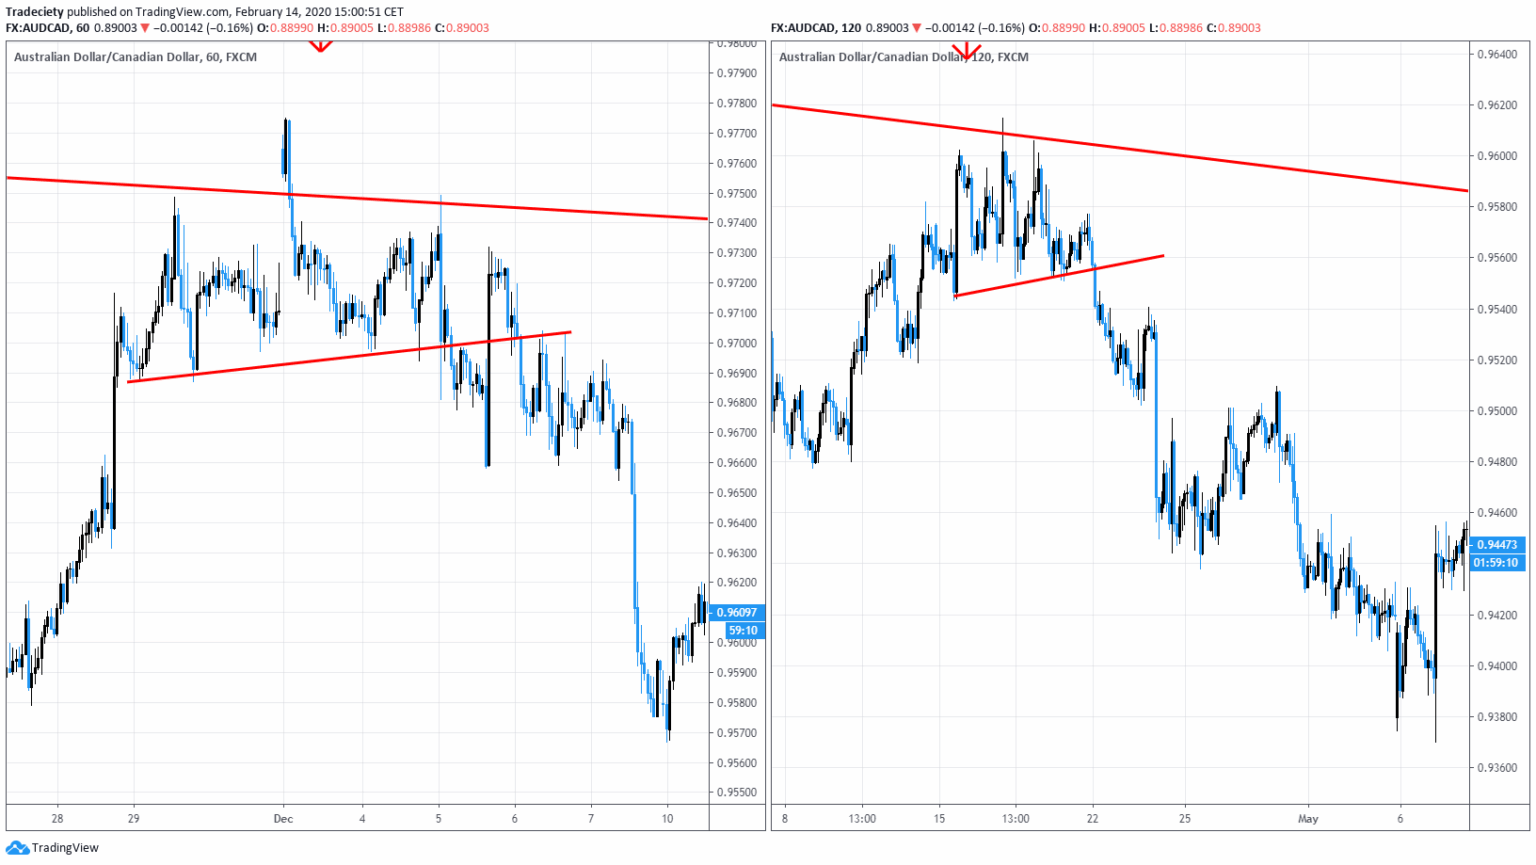
The trend line rebounds can also be used in a multiple frame approach and a trend line has been established once in time, as in screen capture below, a merchant could go to Lowower time points and time that their operations use.
Next, we are going to take a look at the situation within the lower period for the two rebound scenarios of the trend line that I marked with red arrows.
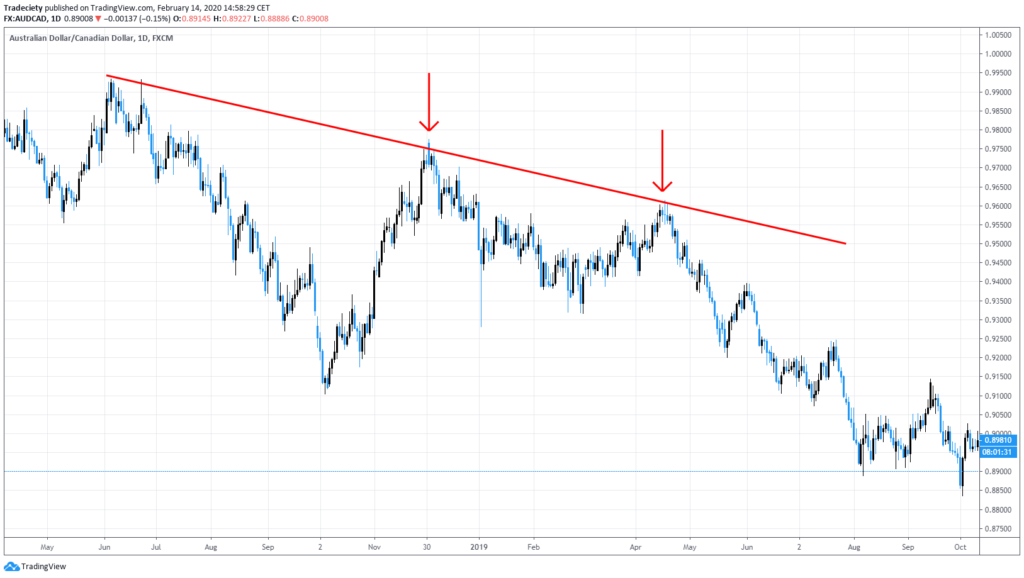
On the left, we see the first rebound (first arrow). The price action was quite messy here, so there is probable that there is no commercial entrance here.
On the right, prices cause a head and shoulder structure and with the help of another short -term trend line, the merchant has timed trade.
The use of a multiple time frame approach can help some merchants enter the operations before and also find the highest reward risk relationship scenarios. However, you can also exchange the Bunce line directly in the high Timframe if there is a favorable candle pattern present.

The trend lines can be excellent tools to have in their toolbox as merchants and some people find that they are more reliable than regular horizontal support/resistance.